Sunsets are among the most breathtaking natural phenomena, offering photographers a dynamic and colorful spectacle that changes from minute to minute. Capturing a sunset in all its glory requires more than just pointing a camera at the horizon—it involves an understanding of lighting, composition, and technical adjustments that transform an ordinary shot into a masterpiece.
This masterclass will guide you through the essential skills needed to create stunning outdoor sunset photography, from preparation and composition to camera settings and post-processing. Whether you are a beginner or an experienced photographer, these tips will elevate your sunset shots to a professional level.
Understanding the Art of Sunset Photography
Sunsets create some of the most visually striking images due to the interplay of warm and cool tones, dramatic lighting, and dynamic cloud formations. The key to capturing the perfect sunset is recognizing the elements that make each scene unique.
One of the first considerations is timing. The “golden hour,” which occurs just before sunset, provides warm, diffused light that enhances the colors of the landscape. However, the most striking hues often appear just after the sun dips below the horizon, during the “blue hour,” when the sky transitions into deep blues and purples.
Another crucial aspect is location scouting. Not all landscapes will provide the same dramatic effect. Coastal areas, mountain ranges, lakes, and vast open fields often create stunning backdrops by reflecting the vibrant sky. Before heading out, research your location and determine the best vantage point to compose your shot effectively.
Essential Camera Settings for Sunset Photography
While smartphone cameras can capture decent sunset shots, using a DSLR or mirrorless camera provides greater control over the exposure and details of your image.
- ISO Settings: Keep your ISO low (around 100–200) to reduce noise and maintain sharpness. Sunsets provide ample light, so increasing ISO is rarely necessary unless you’re shooting handheld in very low-light conditions.
- Aperture (f-stop): A mid-range aperture (f/8 to f/16) ensures a sharp image with a deep depth of field. A narrower aperture (higher f-stop) can create stunning sunbursts when the sun is still visible.
- Shutter Speed: Depending on the brightness, a shutter speed between 1/30s to 1/200s will work well for handheld shots. If using a tripod, longer exposures (1–5 seconds) can create dramatic effects, especially when capturing moving water or clouds.
- White Balance: Auto white balance can sometimes neutralize the rich tones of a sunset. Instead, set it to “Daylight” or adjust manually to enhance the warmth of the colors.
- Focus Mode: Use manual focus if the camera struggles to lock onto the fading light. Focus on a key element, such as a tree silhouette or a foreground object, to add depth.
Composing the Perfect Sunset Shot
Use the Rule of Thirds
Placing the horizon in the lower or upper third of the frame creates a more balanced and visually appealing composition. If the sky is particularly dramatic, allow it to take up more space in the frame.
Include a Foreground Element
A captivating sunset shot is more than just a beautiful sky. Incorporate foreground elements like trees, rocks, water reflections, or silhouetted figures to add depth and a sense of scale.
Silhouettes for Dramatic Effect
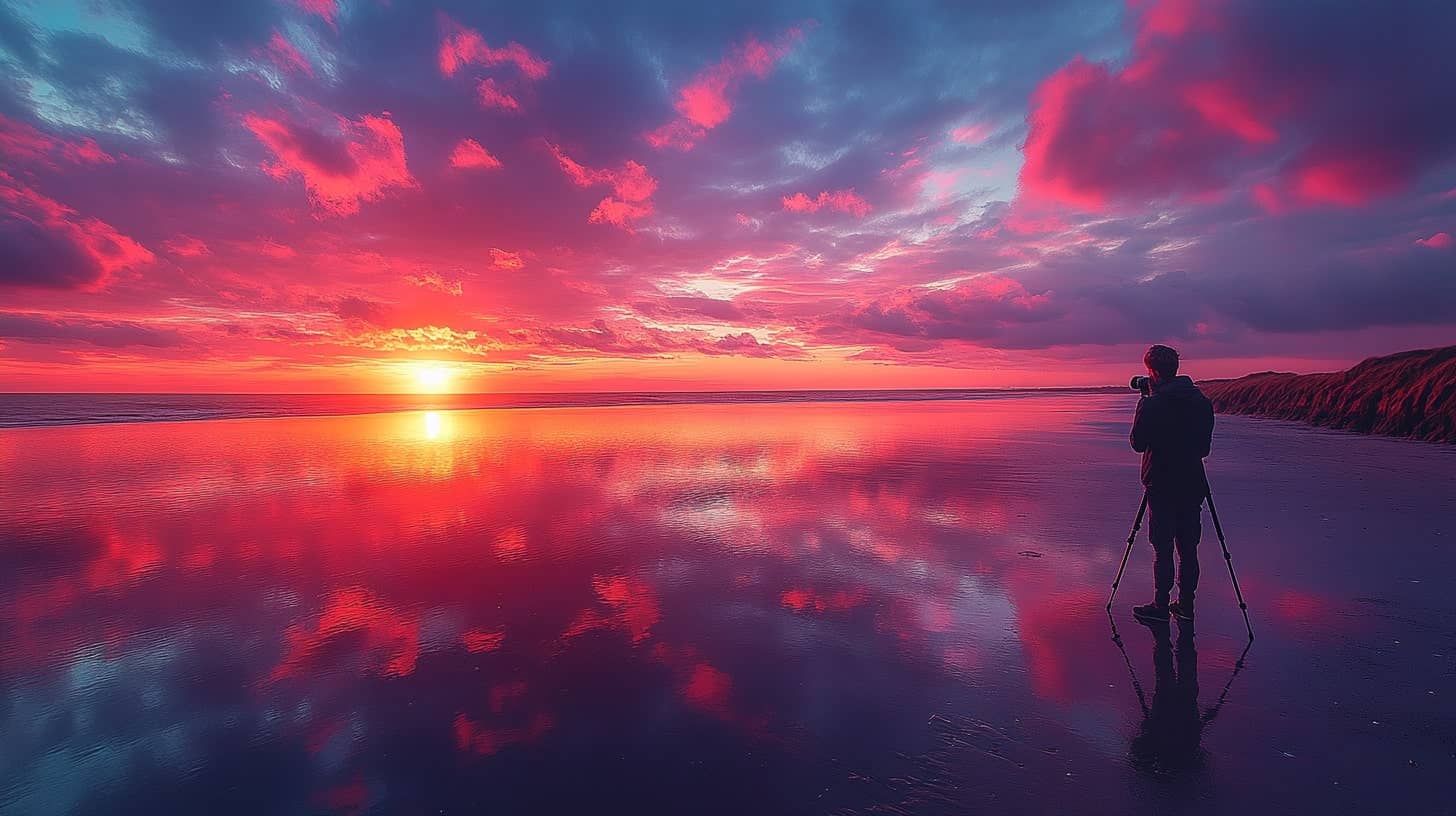
Silhouettes can add a storytelling element to your sunset photos. Position a subject—such as a person, an animal, or a tree—against the bright sky and expose for the background to create a strong silhouette.
Reflections for Double the Beauty
Lakes, rivers, and wet sand at the beach can provide stunning reflections that amplify the colors and textures of the sky. Position yourself so that the reflection mirrors the sunset for a visually captivating image.
Overcoming Common Sunset Photography Challenges
Handling Overexposure
Sunsets often create high contrast between the bright sky and the darker landscape. To prevent the sun from blowing out your highlights, use exposure compensation (-1 to -2 EV) or switch to manual mode to adjust settings accordingly.
Avoiding Lens Flare
While some lens flares can add artistic appeal, excessive glare can ruin an image. Use a lens hood or slightly block the sun with a foreground object to control unwanted light streaks.
Bracketing for HDR Images
If your camera struggles with exposure balance, use exposure bracketing to take multiple shots at different exposures. Later, you can blend them in post-processing to retain detail in both the sky and the landscape.
Post-Processing: Enhancing Your Sunset Images
Even a well-exposed sunset image can benefit from subtle enhancements in editing software like Lightroom or Photoshop.
- Adjust the White Balance: Slightly warming the tones can enhance the richness of the sunset hues.
- Increase Contrast and Clarity: Boosting these settings will make the details in the clouds and landscape stand out.
- Enhance the Shadows: Brightening shadows can reveal hidden details in darker areas of the foreground.
- Use Graduated Filters: A graduated filter can help balance the exposure between the bright sky and darker land.
Avoid over-processing, as excessive saturation can make the image look unnatural. The goal is to enhance, not overpower, the natural beauty of the scene.
Conclusion
Sunset photography is an art that requires patience, practice, and an understanding of lighting and composition. By carefully planning your shoot, using the right camera settings, and incorporating elements like silhouettes and reflections, you can create breathtaking images that capture the beauty of nature’s most mesmerizing moments.
With each sunset, the sky presents a new canvas—so grab your camera, find the perfect location, and start capturing the magic of golden hour like a pro.